Introduction
This Blog will walk through the steps to load data
into Oracle Analytics Cloud Service (OACS) using the rule files from on premise.
Load data into OACS:
There are different
ways for loading data into the (OACS) cloud
1.You
can create rules files in the cloud service (OACS) rules editor.
2.Data
can be loaded into the cloud using the rules files of on-premise Essbase version
of (11.1.24).
Note: Here
we used the rule files which is present in on-premise (11.1.24) version of Essbase
for loading data. Using Option 2 from above.
For more detailed
instructions on how to get rules files from on premise follow the below steps:
- To create an Essbase Rules Files, you have the
following options
- Expand the Application >>
- Expand the
Database >>
- Right Click on ‘Rules Files’ >>
- Select ‘Create Rules Files’ or you can use the
existing rules files it just depends on your data and what you are trying to
load.
Loading data into XmlDb:
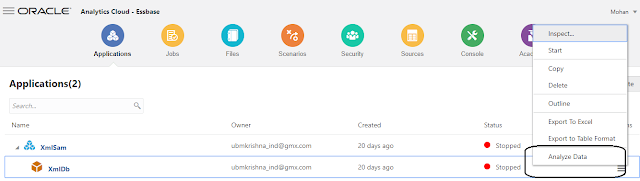
- Select the XmlDb and click on Inspect option at the
top left corner of home page. As shown in the Fig1.1
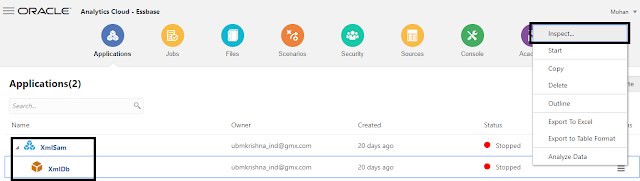
|
Fig:1.1
|
- Select the Files
tab and click on the Upload-Files Button as you need to upload the data files and
rules files. As Shown in the fig:2.2
- File Name pattern for uploading these files must have less than 30
characters
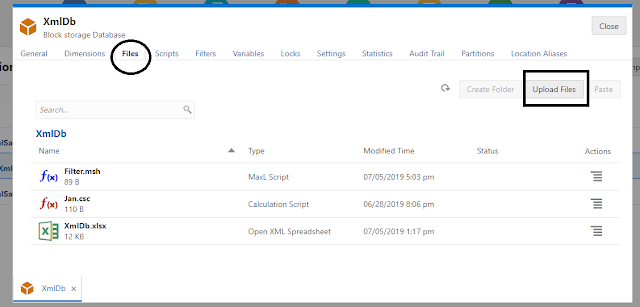 |
| Fig:2.2 |
- The rules file should have ‘*.rul’ appended & once the file upload is complete Click
-> Close.Fig3.3
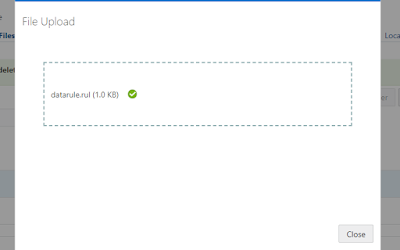 |
| Fig:3.3 |
- The data load file should be ‘*.txt’ appended & once the file upload is complete Click->
Close Fig:4.4
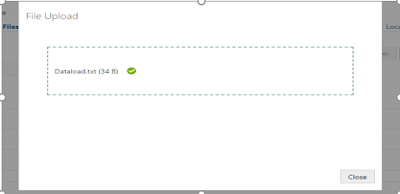 |
| Fig4.4 |
- Return to the Home Page & Click ->Jobs.
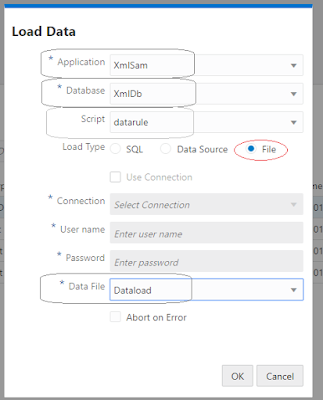
- Select the New job and choose Load Data as the job type. For reference Fig 5.5
 |
| Fig:5.5 |
- Select the required fields i.e. Application, Database,
Script & Data File fields
- Click ->OK.. Job will start
Execute & Status of the job is displayed in next screen shot Fig:6.6
 |
| Fig:6.6 |
- The status of the job is “In-Progress” and Refresh the page. Look into the Fig 7.7
 |
| Fig:7.7 |
- Once the jobs status turned into success state, it
means the records loaded successfully. Fig:8.8

|
| Fig:8.8 |
- Return to the Home page, Choose
Analyze Data
option in the bottom left corner of home page to have a quick look into data
which loaded from the above step. Fig9.9
 |
| Fig9.9 |
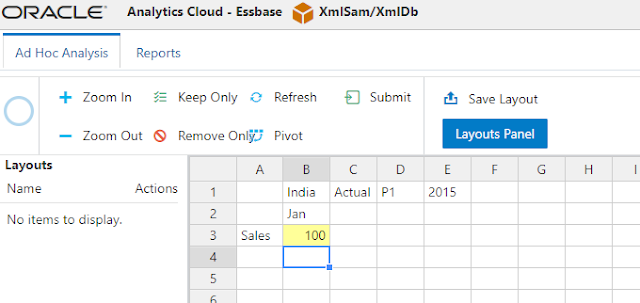
- You can see the Adhoc analysis it same as the SmartView data in the
fields. Fig 10
 |
| Fig:10 |


